How to create a custom debounce react hook using useEffect
Debouncing, its need and creating a custom react hook around it to improve your application's performance

Introduction
When you type into google docs, does it save your changes at every keystroke? No, it does not, it waits, holds on for some time after your last keystroke/change and then fires up the save functionality. That right there was debouncing.
Debouncing is the process of bouncing off the execution of a function triggered from some event until the user is done firing that event for some time. This is done to reduce unnecessary api calls to the server and prevents the UI to process a drastic number of events. More about it later on.
If you carefully notice, debouncing is a concept implemented in most of our daily use applications, be it Google Docs, auto code completion suggestions in VS Code, searching at say e-commerce websites and more.
This blog will help you integrate debouncing into an image searching app input through creating a custom react hook. Let's dive into what a custom hook is, more details on how debouncing works and what's the need for debouncing.
What is a custom react hook
If you already know the rules for creating a custom react hook, I'd recommend you to move on to the next part. For those who don't, carry on, it's actually quite simple.
A custom react hook is basically a JavaScript function that may call other hooks, whose name starts with 'use', so that react knows that this function has to follows the Rules of Hooks.
Now why does react wants to apply the Rules of Hooks on a custom react hook?Because like I said, a custom react hook usually uses other react hooks in it's internal implementation.
To sum up, creating a custom hook is quite simple, just create a function with it's name starting with 'use' and you are good to do. Just like a function, you can decide what argument this hook takes and what or if it should return something.
What is debouncing
Debouncing is a technique used to prevent the UI from processing unnecessary events, improving the app's performance and making the overall UX better.
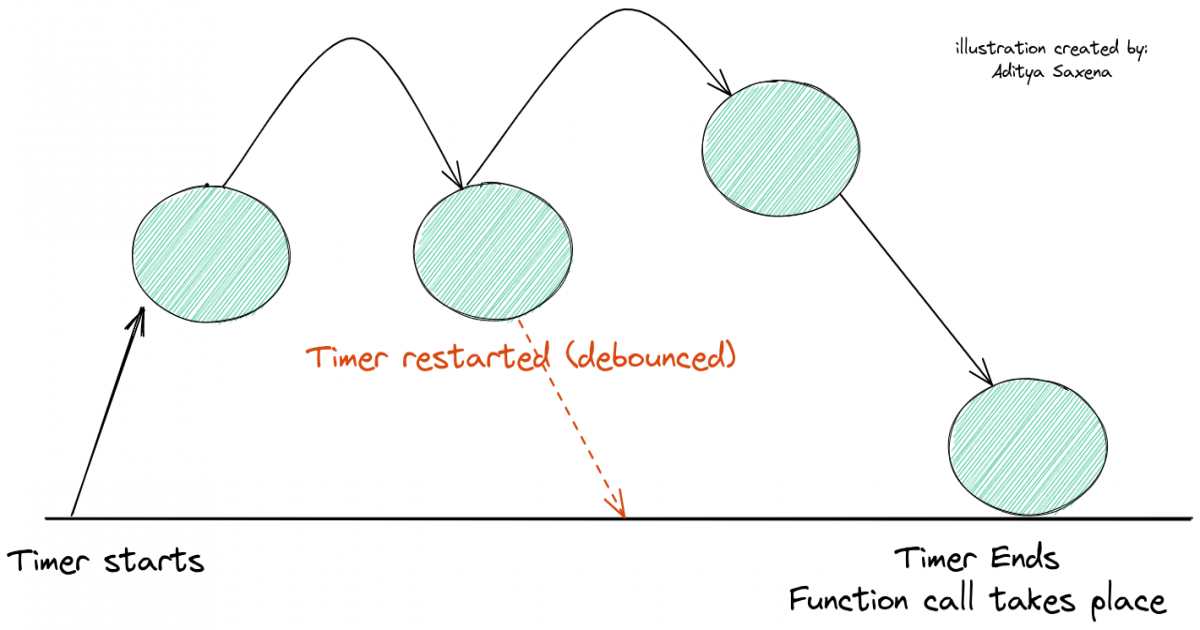
Whenever an event that needs to be processed is fired up, a timer starts. If the same event is not fired up again until the timer ends, the handler function for that event is run and the processing takes place. But if the same event is fired up again while the timer is running, the timer restarts, bascially debouncing the processing part.
Let's understand this better using an example.
Say you want to implement auto save functionality into a todo app. You would have an API to make a POST request to the server with the updated text.
Now, if you are using react, you'll probably have a state for the todo text which will be updated at each and every change in the text, every keystoke.
Saving the updated todo in the database at every small change/every keystroke is unnecessary. It will increase the load on your server and is time taking, making the app slower.
How debouncing comes into picture here is, using the concept of debouncing, you can define a time period (debounceTime) until the last change made and then make the API call (debounceFunction) to save the updated text, all at once.
The first keystroke starts the timer, the next change if made under the defined debounceTime ends the previous timer and starts the timer again, this process keeps happening until the last keystoke/change made. For the last keystoke/change made, the timer will eventually end, leading to a callback to the debounceFunction (the save API call) which will finally save all the changes made, at once.
If the concept still seems a bit confusing, don't worry, the upcoming implementation part will make it crystal clear for you.
Implementation
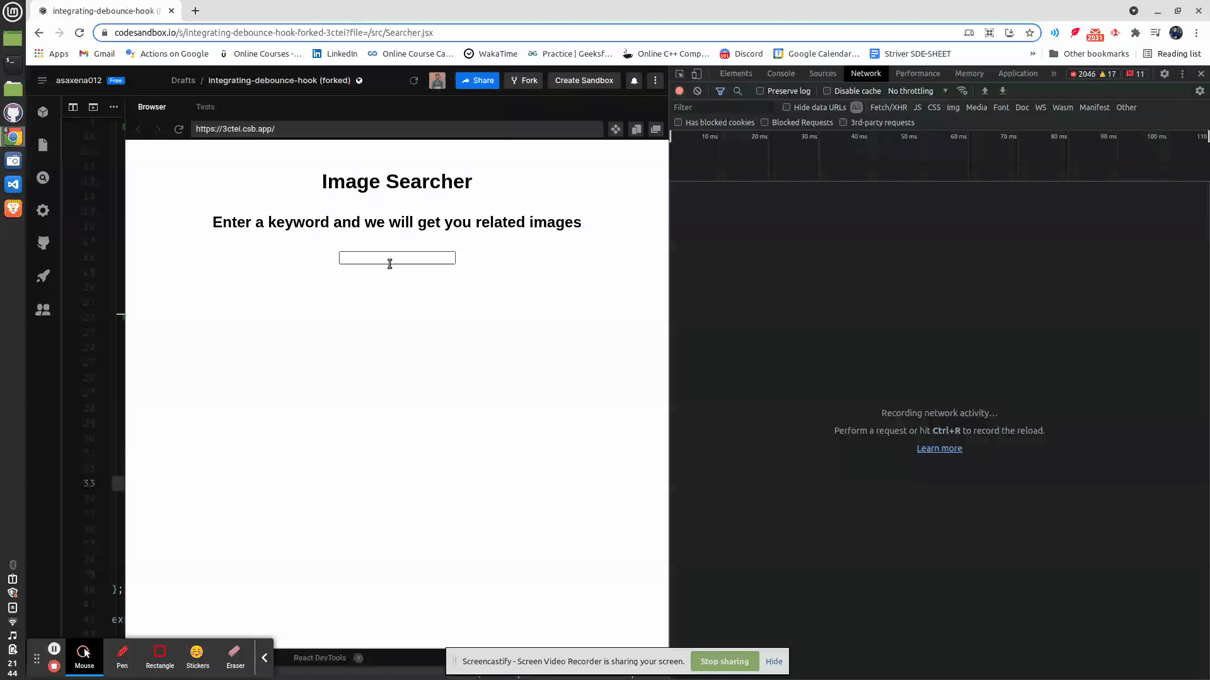
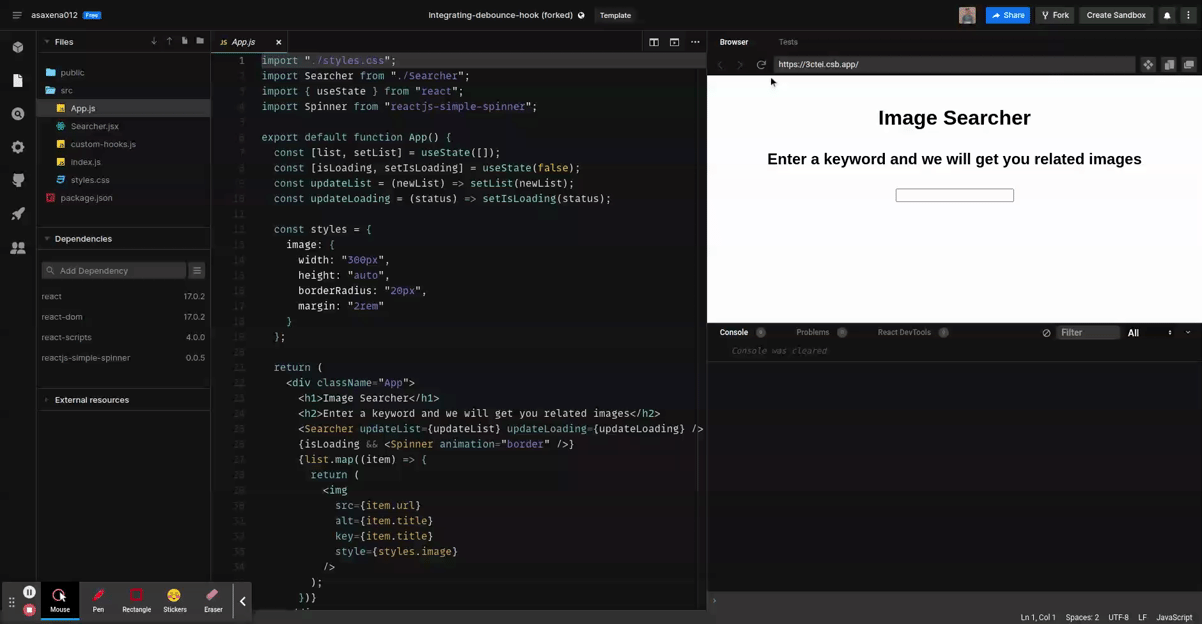
The boilerplate - Image Searching App
It's a basic react app through which user can search for images across the web given some input keyword.
The API we are using for fetching images based on a keyword is Web Search API.
I'd recommend going though the codesandbox below, play around with the app to get an idea what it does. If it seems too much, my recommendation would be to implement the boilerplate from scratch yourself.
What changes we want to do
In the boilerplate app, we are making the API call on a button click, now what we want to do is to make the API call automatically when the user stops typing.
Let's start by calling the API at every state (keyword) change. How do we implement that? Let's break it down.
We want to cause a side effect (fetchAndUpdate call) and re-render our app depending on a variable.
Well useEffect was made for this, isn't it?

// Depending Variable -> keyword state
// Side Effect -> fetchAndUpdate

useEffect(() => {
    fetchAndUpdate();
  }, [keyword]);
fetchAndUpdate will be called whenever the state keyword changes.
Take a look at the networks tab when we type the word 'doggo':
As expected, we made a search call for every change, 'd', 'do', 'dog', ... For a moment, it fetched and rendered Snoop Dog's images.
So, we see where the problem is with this approach: unnecessary API calls, computations and rendering. I don't wanna see Snoop Dog's images when I'm looking for cute doggo images, right?
Well, the solution to this problem is debouncing. We can keep debouncing the trigger until some time after the user has made it's last change.
Creating our custom hook - useDebounce
We'll start by building our logic on how to actually debounce the side effect.
For now let's assume that we keep the debounceTime as 500ms.
That means after a state change, we will wait for 500ms to actually call the side effect. If the state changes again before 500ms are spent, we will forget about the previous change and wait for 500ms again to call the side effect.
We can use setTimeout to implement this logic.
- Whenever the state changes, we start the timer with our side effect function (fetchAndUpdate) as the callback, and 500ms (debounceTime) as the time to be spent before making the call
- If the state changes again, we will clear the previous timeout (clearTimeout(timer)) and the timer will start again because of the re-render
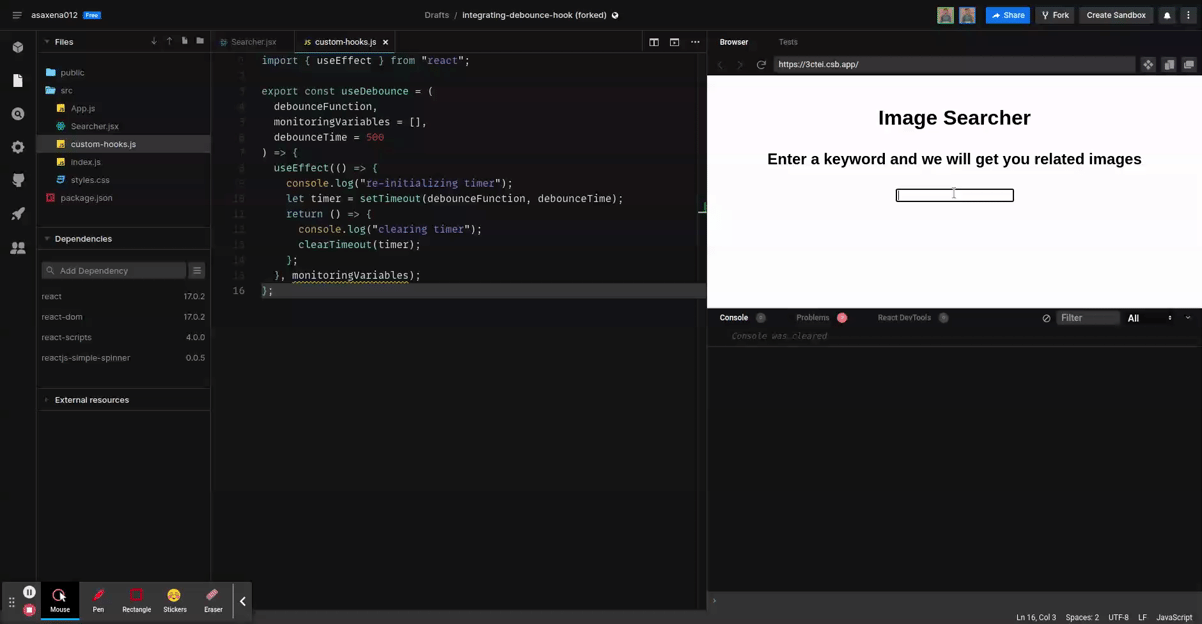
Let's create a custom hook useDebounce which takes in the debounceFunction, the dependency array and the debounceTime.
Here's how it'll look:
import { useEffect } from "react";

export const useDebounce = (
  debounceFunction,
  monitoringVariables = [],
  debounceTime = 500
) => {
  useEffect(() => {
    let timer = setTimeout(debounceFunction, debounceTime);
    return () => {
      clearTimeout(timer);
    };
  }, monitoringVariables);
};
This is how the custom hook will be called in Searcher component:
const Searcher = ({ updateList, updateLoading }) => {
  const [keyword, setKeyword] = useState("");

  const fetchAndUpdate = () => {
    ...
  };

  useDebounce(fetchAndUpdate, [keyword]);

  return (
   ...
  );
};
Let's discuss how this hook implements our debouncing logic:
- When the keyword state changes, the Searcher component re-renders, due to which the useDebounce hook is called again.
- Now calling the hook again actually means that it first unmounts and then remounts
- When the useEffect sees an unmount, it fires up the clean up function, which clears the timeout, erasing any previously run timer.
- The remounting then re-initializes the timer and sets up a new timeout.
To sum up, on state change the timer restarts or the side effect debounces.
If you don't get it, don't worry this might help clear things up:
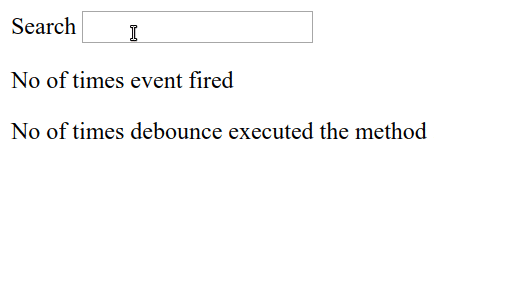
Putting console logs at the API Call, re-initilization and timeout clearing (clean up function):
Typing the word 'dog':
Another look the network calls now, remember the keyword, 'doggo':
Better, right? Just one API call.
That's it, you can now use this hook anywhere to implement state dependent debouncing.
Here is the codesandbox for you to play with it:
If you played with it good, you'd have seen an issue with this solution. The unnecessary API call at the initial render. Let's solve that too, shall we?
Solving the unnecessary initial render call

Although this solution might work, there still exists an optimization we can make.
Let's take a look at the console logs on initial render:
The side effect takes place on the initial render, thus the unnecessary API call. That's what useEffect does, it by default runs whatever is inside it on initial render.
A possible and simple solution is to keep a flag that stores whether current run is an initial render or not, and based on that flag we condition our side effect inside useEffect.
import { useEffect, useState } from "react";

export const useDebounce = (
  debounceFunction,
  monitoringVariables = [],
  debounceTime = 500
) => {
  const initialRender = true;
  useEffect(() => {
    if(initialRender){
        initialRender = false;
        let timer = setTimeout(debounceFunction, debounceTime);
        return () => {
          clearTimeout(timer);
        };
    }
  }, monitoringVariables);
};
See the problem with this solution is every render is an initial render, every time the function runs, the value will be re-initialized.
We need the initial render value to persist between renders, well, do we have a hook for it?
You guessed it right, useState.
Storing the flag as a state will do the job, but updating the state will in turn lead to re-renders itself.
There has to be a neater solution, and there is, something like an instance variable in react. Quoting the react documentation FAQ :
Is there something like instance variables? Yes! The useRef() Hook isn’t just for DOM refs. The “ref” object is a generic container whose current property is mutable and can hold any value, similar to an instance property on a class.
The useRef Hook, can actually persist it's value through out the component's lifecycle.
Let's see the solution using useRef:
import { useEffect, useRef } from "react";

export const useDebounce = (
  debounceFunction,
  monitoringVariables = [],
  debounceTime = 500
) => {
  const initialRender = useRef(true);

  useEffect(() => {
    if (initialRender.current) {
      initialRender.current = false;
      return () => {};
    } else {
      let timer = setTimeout(debounceFunction, debounceTime);
      return () => {
        clearTimeout(timer);
      };
    }
  }, monitoringVariables);
};
This solution works elegantly, leaving the final codesandbox for you to try it out.
Conclusion
This custom useDebounce hook we created today can be used to implement auto save, search suggestions, auto code completion and more.
On another note, debouncing also makes a really good interview problem for Frontend/Fullstack roles
Thank you for reading it this long, and if you liked my efforts, it would mean the world to me if you could share this among your peers.
If something seems wrong or is not clear, I would love to address doubts in comments!
Thanks again! Happy Learning.